


How to Install WordPress via Softaculous Auto-Installer
WordPress is the world's leading Content Management System (CMS), powering over 43% of all websites on the internet. Thanks to its flexibility, it is suitable for everything from personal blogs to highly complex online shops. In this guide, we will show you how to install WordPress in just a few minutes on your Curiaweb hosting account using the Softaculous Auto-Installer.
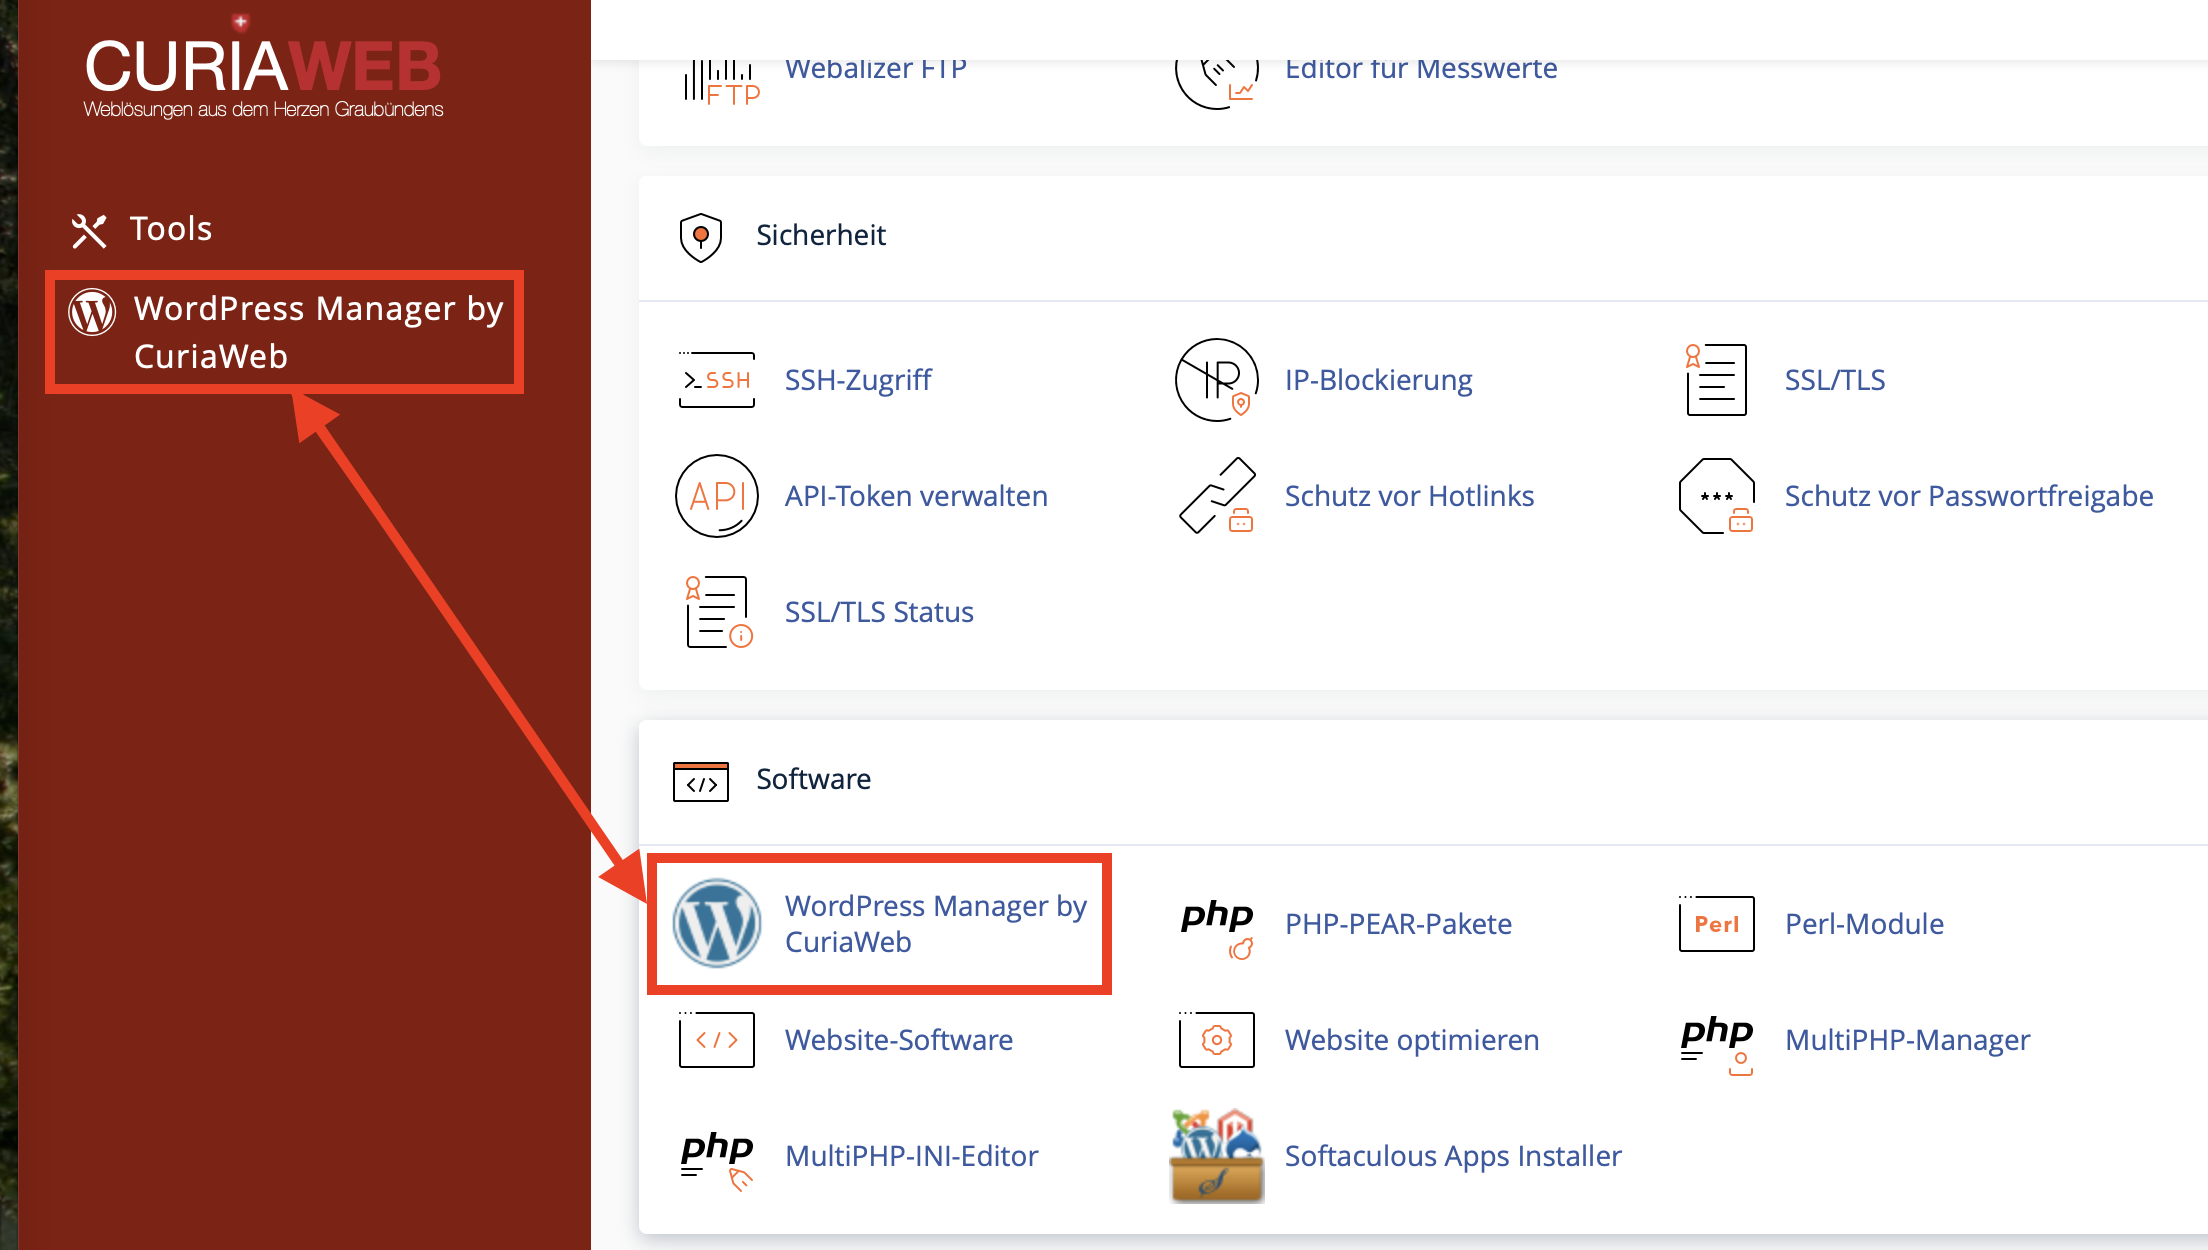
Step 1: Getting Started in cPanel
The first step leads you to your cPanel account. Log in to your client area and click on the corresponding button for the cPanel login.
- Look for the "Software" section in cPanel.
- Click on the "WordPress Manager by Curiaweb" or "Softaculous Apps Installer" icon.
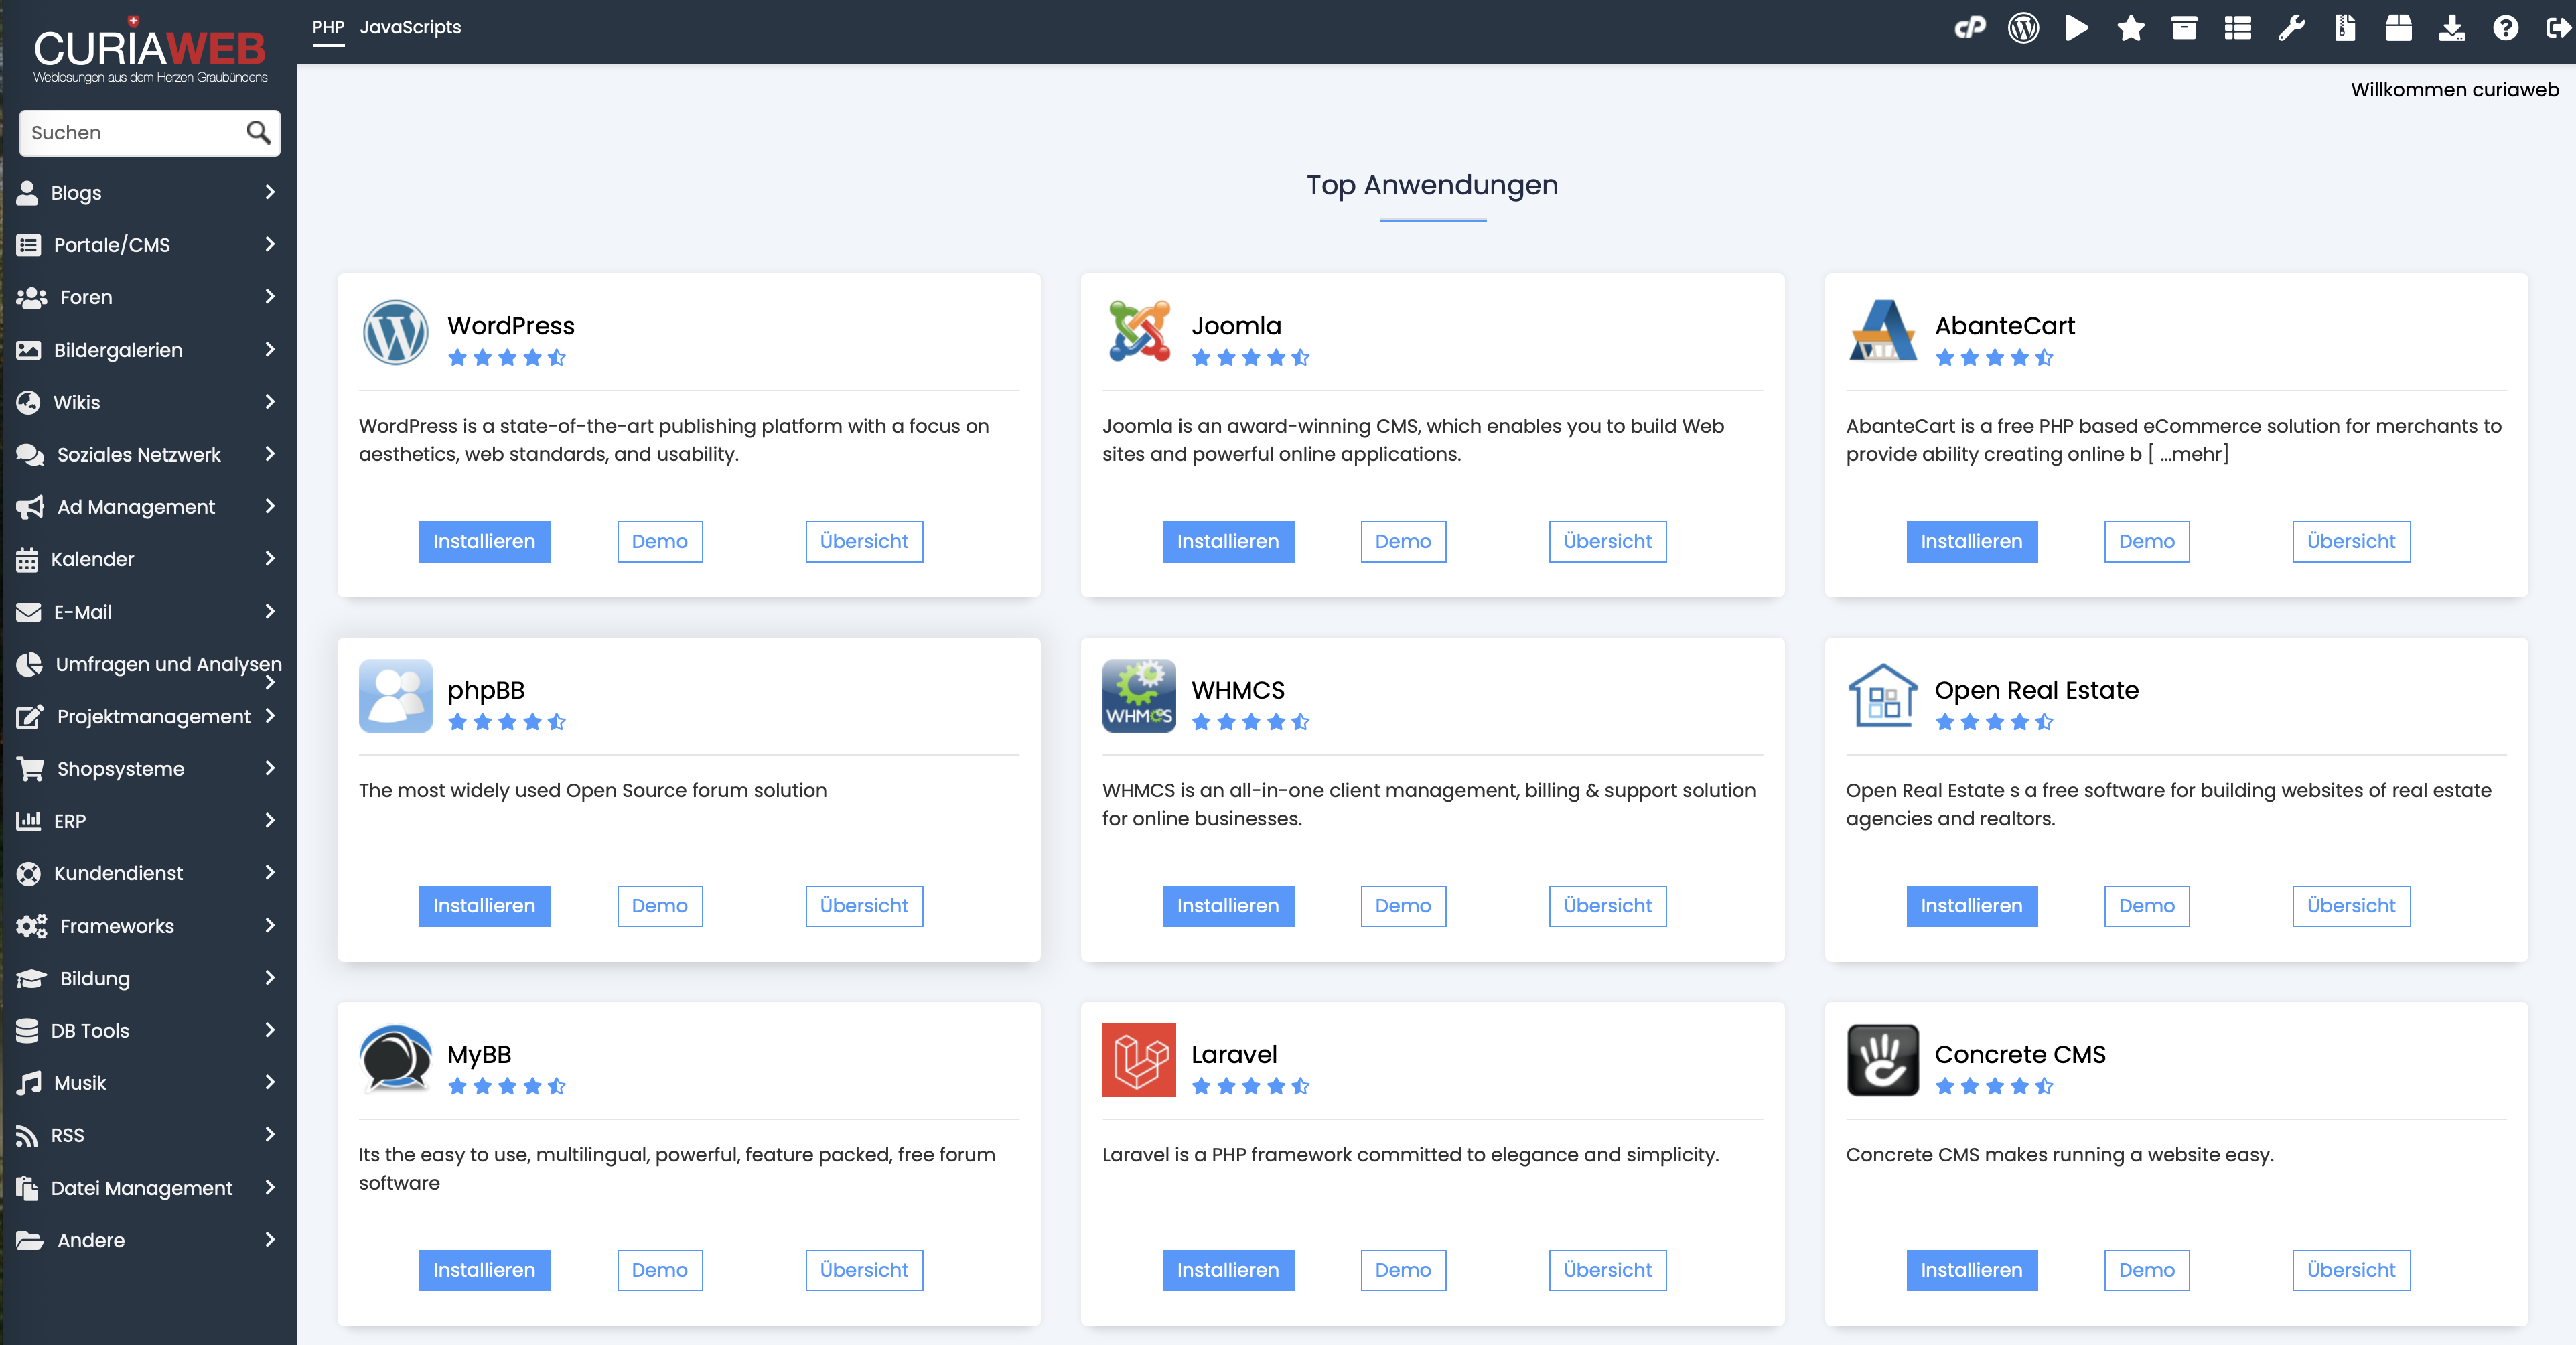
- In the Softaculous dashboard, you will find WordPress directly under "Top Scripts". Click on the WordPress logo or the "Install Now" button.
Step 2: Software Setup and Protocol Selection
After clicking "Install Now", the configuration page will open. Here you set the technical foundation:
- Choose Version: We always recommend using the latest version to benefit from the latest security features.
- Choose Protocol: Select
https://. Please note that an active SSL certificate is required (included by default via Let's Encrypt at Curiaweb). - Choose Domain: Select the domain where WordPress should be installed.
- In Directory: Leave this field blank if the website should be accessible directly at
yourdomain.ch. Enter "blog" if the address should beyourdomain.ch/blog.
Step 3: Site Settings and Admin Account
In this section, you define your site's identity and the backend access:
- Site Name & Description: These details appear in the browser tab and are SEO-relevant. You can change them at any time in the WordPress backend later.
- Admin Account: Strictly avoid using the username "admin". Use a unique name and a strong password (use the key icon for the generator).
- Admin Email: Enter a valid email address, as it will be used for password resets and system notifications.
Step 4: Advanced Options (Database & Backups)
Click on the plus sign next to "Advanced Options" for additional control:
- Table Prefix: Change the default prefix
wp_to something unique (e.g.,cw_7b_) to protect the database from automated SQL injection attacks. - Updates: We recommend enabling automatic updates for "WordPress Plugins" and "WordPress Themes" to close security gaps as quickly as possible.
- Backups: Although CURIAWEB backs up your data externally, you can schedule additional local backups here. Please keep your available storage space in mind.
Step 5: Complete Installation
Optionally, you can select a theme (design) at the bottom of the page. This is not mandatory, as WordPress starts with a default theme.
Now click the "Install" button. The process usually takes less than a minute. Upon completion, you will receive:
- The URL of your new website.
- The administrative URL (usually
yourdomain.ch/wp-admin) where you can log in.
Congratulations!
WordPress is now ready for use. If you encounter any problems during installation, our support team is happy to assist you at any time.
Learn more about WordPress Hosting